Showing posts with label motor. Show all posts

Sunday, 30 October 2016

FT Cruiser X-57. First Flight.

...hey I made an X-plane. sort of...

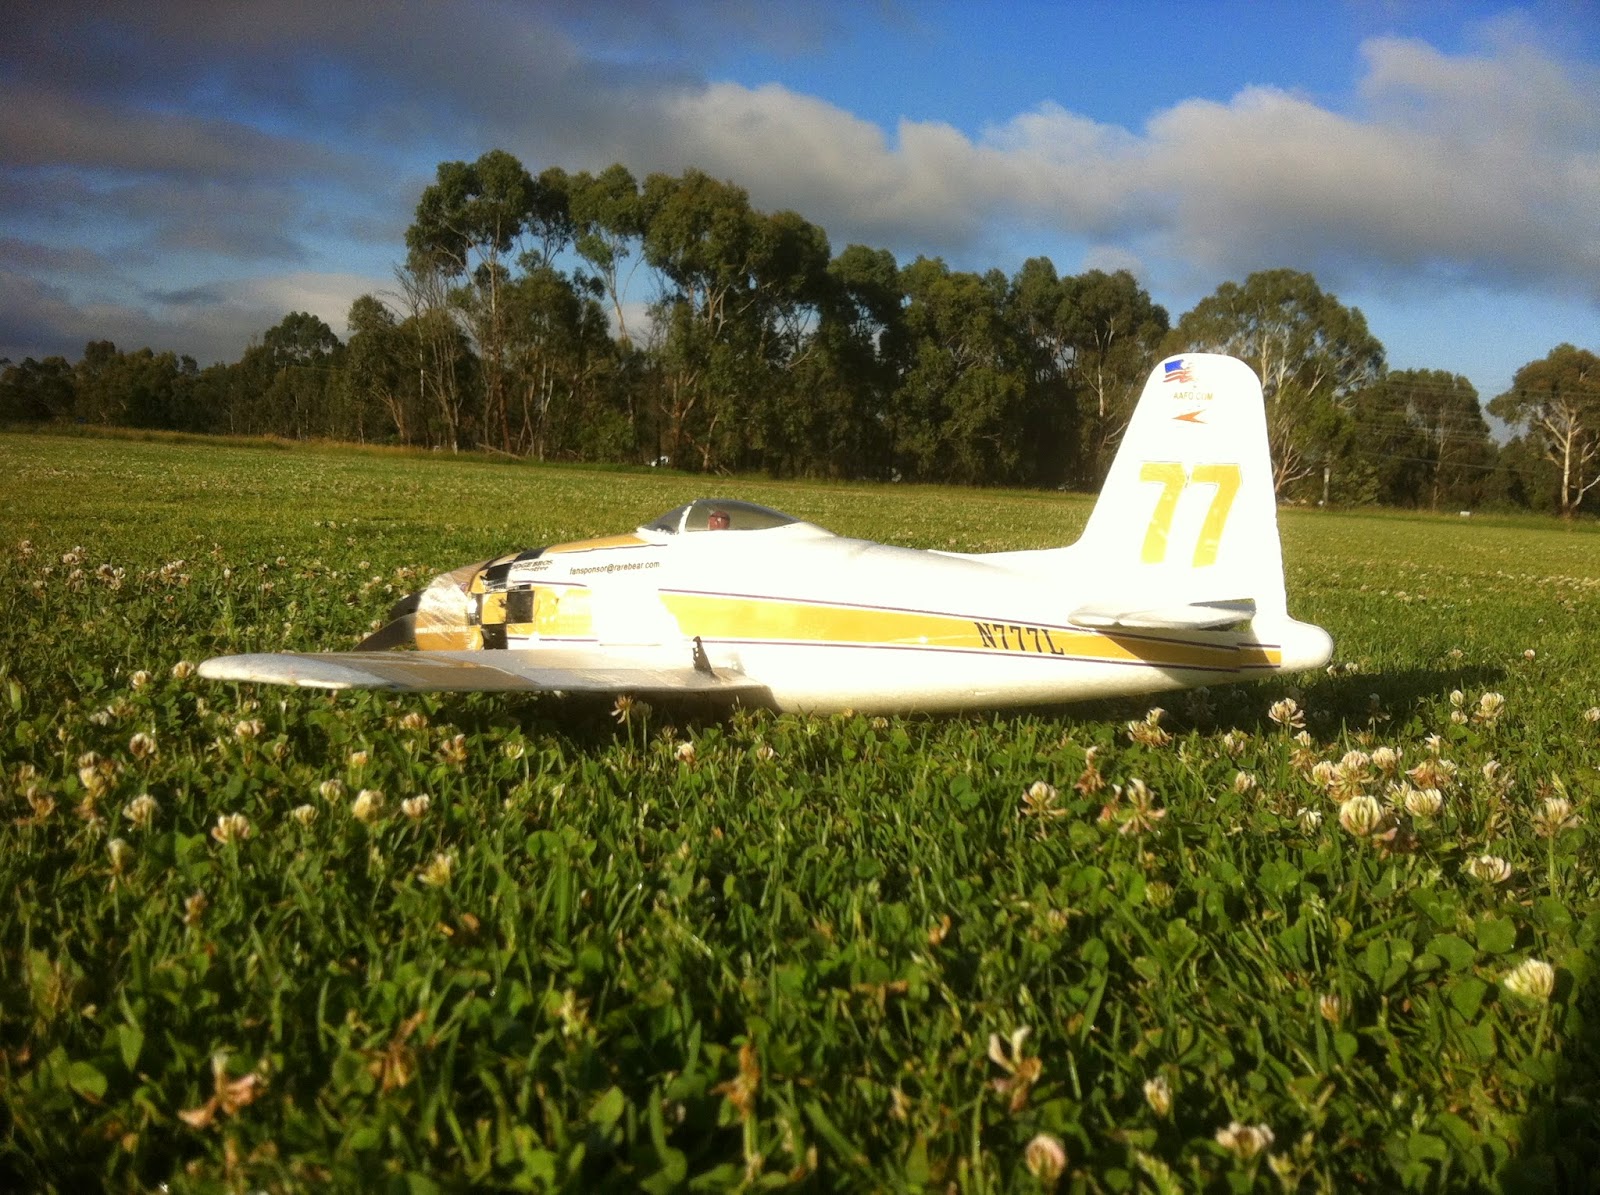
Having seen NASA's intriguing X-57 Electric Research PlaneI decided to converted Flitetest's twin-engined FT Cruiser into an RC version of NASA's experimental plane, featuring twin electric motors mounted in the wingtips.


The X-57 actually features 14 motors, twelve small motors with folding props mounted in the leading edge of the wings providing supplementary power for takeoff. The two larger motors installed in the wingtips provide the high-speed cruise propulsion.


I wasn't going to be wiring up fourteen motors, so I dispatched with the dozen leading edge units favouring the simpler hand-launch solution. I used small 89W quad motors (1806 2300kv) running at on a 3S 2200 battery. The propellors are 5x3 props, swinging inwards sweeping air onto the top of the wing to counteracting the wingtip vortex.


This is one of the main benefits of the wingtip design, a second being that the concentrated wingtip flow feeds into the propellor, increasing the dynamic thrust. Finally, additional thrust is generated by virtue of the outside sweep of the prop being unimpeded by the presence of a wing; the prop wash goes into free air.

The modified FT Cruiser with weighs 940g all up, or 749g without battery compared to the spec mass of 766g. The 17g difference is due to reduced wing size, one less servo (rudder servo ditched in favour of differential thrust) and smaller motors. However, 7g ballast had to be added to the nose for CoG correction due to the motors being set rearwards compared to the standard Cruiser configuration.


The motors generate a combined 710g of thrust as installed, sufficient for cruise but certainly not 3D flight. Static thrust of a commercial aircraft is a quarter of its loaded weight and around half of its empty weight. In the case of the xCruiser this would equate to 235g to 470g respectively. So it's comfortably powered in aircraft terms although less so in RC terms where closer to 100% is nice-to-have...

Thursday, 21 July 2016

Fox Glider with Funfighter Motor.

...back with avengeance

The little Fox glider is a beautiful flier, however mine has always suffered from motor vibration. Even the addition of a supplementary firewall didn't make much difference, so the little Fox was eventually consigned to hang on the wall whilst I decided what to do.


Help came in the form of the forced retirement of the Radjet, and I transplanted the Funfighter motor I'd installed there into the Fox. To complement this I'm using a 1500 4S Zippy compact battery, lightweight enough not to tax the speedy motor but large enough to provide generous flight times for the sleek Fox.

The result is speedy, the slippery Fox now genuinely fast and very quiet, the Funfighter motor providing it with landscape-traversing speed and generous, although not unlimited, vertical climb.

So all in all a simple and very successful transplant, the Fox glider flying with the Radjet's heart...

Tuesday, 19 July 2016

SR71 Blackbird. First Flight.

...blackbird of noisiness

The SR71 is a Parkjets design, one of those "stickplanes" which combine simple construction with characteristic design cues that define the aircraft.

I chose to do the 125% version, giving a wingspan of 840mm and a length of 1250 and making it quite an impressive aircraft.


I chose to power the Blackbird with a funfighter motor I'd liberated from my old Rarebear. This motor is a little under-specced for a plane this size, yet it managed to give the SR71 a decent turn of speed nonetheless. I was going to use a 1500 4S lipo but, unable to get CoG sorted, opted for a heavier 2200 4S to balance things out.


My main concern approaching launch was not it's flight characteristics which, being a large delta promised to be benign, but the proximity of the handhold to the propellor! Fortunately this concern was unfounded, and the SR71 took to the skies beautifully stably.

As the Blackbird accelerated away, it became apparent that this is a very noisy plane, even noisier than the Radjet with the same motor...

Saturday, 30 April 2016

Firstar V2. 70mm EDF Conversion.

...flies and sounds better

The flight performance of the Firstar has been very disappointing, mainly I think because of the effect of the negative thrust angle which effectively just increases the wing loading.

So, like I'd long considered with the Floater Jet but never actually did, I've replaced the pusher prop with a low-mounted 70mm EDF installed directly on the body mount used for the stock motor tower with large cable tie straps screwed in place.


The EDF is rated at about 1.2kg thrust, far more than required, so I'm only running it at 60% speed on a 3000 4S lipo, which is more than adequate. In conjunction I've also replaced the stock 30A ESC with a 50A unit.

The thrust line of the EDF is virtually through the centre of lift on the wing, and this shows on launch with the V2 flying straight and then beginning to climb as the speed climbs, in stark contrast to its behavior with the tall pusher prop where it always nosed in and was reluctant to climb.

The much sleeker form, with the tower and foam shroud, means that it's also faster through the air, if required, and glides very well. And, if you needed more benefits, it also sounds brilliant...

Sunday, 12 July 2015

Trainstar Tough Trainer EPO 1400. D4023 850kv Replacement Motor.

...fitting the Trainstar replacement motor

Having struggled to get a replacement prop adapter for the Trainstar, I finally decided to get a whole new motor, the D4023 850v from Hobbyking.

This seemed rather wasteful as I only really needed the adapter, but anyway. The D4023 comes with a steel prop adapter, hopefully more durable than the Volantex aluminium item but is otherwise pretty much a direct equivalent replacement.


The D4023 does actually have a different mounting pattern on the bell  mount, three holes instead of four, but fortunately the Volantex saddle mount has a multi-hole configuration which accepts the three-hole pitch with no rework required, which is great.

So the installation is a pretty simple switch-out; even the wire length is just right. The only extra work required is that the D4023 doesn’t come with any connectors, but a few minutes soldering got some 3.5mm bullet connectors fitted just fine…

Trainstar Tough Trainer 1400 EPO. D4023 Motor Test Flight.

...test flying the new motor

Fortune smiled this afternoon with the growing cloud cover holding up just enough for a scenically sunny afternoon for flying. Conditions were a little choppy but, given the lovely afternoon, we were going to give it a try anyway.

As well as being the test flight with its new motor, this was also the first time I’d flown the Trainstar for months after its collision with a light pole, so it was perhaps not surprising that it was out of trim.


As soon as it took off, it was evident that the Trainstar had become very floaty, in contrast to the nose-down attitude I’d been flying it previously. Nevertheless, it was still fun to have it back in the air.

After having a bit of fun floating it around, I brought it in to check trims, and then it was back in the air, flying a bit flatter than before. It was still not smooth flying though, with gusty conditions and wind shear above tree level turning the Trainstar into a kite of sorts.


The new motor performed very well, at least as powerful as the OE unit, and perhaps a little more. Considering its modest cost and ease of replacement, it’s a viable alternative to Volantex’s dodgy prop adapter…

Friday, 10 April 2015

Installing Turnigy 2217 1050kv Motor into Raptor Glider

...a tight fit

The replacement motor for the Raptor glider, a Turnigy 2217 1050kv unit, arrived a few days ago and I've just finished installing it into the Raptor glider.

Replacing a Phoenix motor, which has a bell mount, the Turnigy was an unexpectedly tight fit due to the motor installing straight onto the firewall, with the result that the motor cables are squeezed between the motor and the fuselage.


To move the motor back a little, and to strengthen the mount which is just 3mm ply, I glued in a second firewall which is provided as a spare with the Raptor. The motor is turning freely so I think there's just enough room for the outrunner to clear the cables. 

The downside to pushing the motor back , as I discovered when I installed the motor, is that the shaft stickout is marginal. However the spinner has tightened up and the prop is turning fine, so it might be OK...

Wednesday, 18 March 2015

Canadair Power Climb

...impressive for a flying boat

The Canadair had a power-plant upgrade some time ago to the high-power higher-speed Turnigy bell motors. The Canadair also inherited a very nice Zippy Compact 2700mAh battery bought for the Trainstar floatplane.


The combination, in conjunction with smallish 7x4.5 props, means that the Canadair packs a potent wallop and is capable of indecently fast speeds. Also, with the fat power pack, it can sustain high rates of climb with no problem at all.

On a very nice cool morning I enjoyed sweeping the 
Canadair in low over the field and then climb it steeply in a full-throttle climb until it threatened to disappear from sight. Then, and just as enjoyable, I'd let it float down in a serene glide...


Monday, 2 March 2015

Raptor Glider Take 4

...niggling issues

On the weekend I took the Raptor glider to the field for what I was hoping would be its second flight, having reinstalled the motor and tidied up the frayed wiring. I was, however, foiled initially by a passing shower and then by a mysterious electrical gremlin.

Initially I suspected the battery to be flat, but it turned out that an exposed bit of wiring of the old battery may have contacted the conductive carbon canopy. So, I taped up the battery and yesterday took the Stinger for what I hoped would be its first proper flight.


The motor seemed to be running well as I launched the Raptor into the morning sky, the large glider climbing steeply in the crisp air. The Raptor seemed to be flying well, although the motor seemed a little less powerful than I had thought.

Things seemed to be going well until, after a slow flypast, flicking up the throttle effected only an ominous rattle from the motor meaning just one thing; one pole was no longer with us.

Taking a whiff in the cockpit after the Raptor had glided down to earth, a faint smell of toasted electronics indicated that the repaired motor may have recently become deceased...

Tuesday, 23 December 2014

Canadair New Motors

...more speed!

I fitted the Canadair with three-blade props of 7x4.5 on the basis that dropping a size from the standard 8" twin-blade props is recommended. However, in this case, the originals are big paddle-props so a change to regular three-blade props of the same size would probably have been a better equivalency.


An issue with the bearings in one of the motors, which I was unable to remove for replacement, had me shopping for new motors and I came across the more powerful 250W version of the specified motor. Being the same size and weight, although with a lower quoted current draw, it seemed a natural choice, now that I had a better appreciation for the performance of the Canadair having flown it.

Also, given that the 7x4.5 props were undersized for the original motor, the higher kV rating, 1650 vs 1400, suits them very well, and the Canadair seems happy with the new combination and generates an impressive turn of speed at full throttle...

Sunday, 14 December 2014

Rarebear Slow Prop

...shows how good the original is!

I recently had a minor incident with the Rarebear; the result of me somehow reversing the elevator, probably while I was adjusting settings on the transmitter. The result was the Rarebear nosediving straight into the turf, although fortunately with the ground being very damp there, the damage was limited to a broken prop.

Unfortunately I'd used the last of my Funfighter props on the Radjet, which now uses the same propulsion system as the Rarebear.  The only alternative were some APC style props which I'd bought based on reviews, so I got one out the bag and fitted it to the Rarebear.


This morning, a lovely cool and calm start to the day, I took the Rarebear along to try it out.  Flying on the 3S 1300 battery the Rarebear is usually pretty quick, although manageable, so I was quite amazed at how much slower it was compared to flying with its original prop.

While you would think there wouldn't be much difference between a 6x4 and a 5.5 x 4.5, it just shows what a brilliant combination the original prop and motor are together...

Wednesday, 24 September 2014

Funfighterjet

...radical

A while ago the Radjet slowed down a bit, becoming somewhat pedestrian to fly. At this stage I decided to do a battery swap with the Rarebear and run the Radjet on 4S battery instead; the little buzzy being alarmingly fast flying on the high-voltage pack.

Recently, however, the Radjet suddenly regained its mojo and became seriously fast, carving up the sky in a most endearing manner. Unfortunately, this resurgence of speed was short lived with the Radjet reverting to its previous underwhelming state. The bearings in the stock motor being the main suspect.


However on my spares shelf I happened to have a spare Funfighter motor whichwas too good to resist as a parcel-filler with a previous purchase. Deciding this was the time, I set to stripping the old motor out of the Radjet.


This is a relatively simple process although, with the motor mount being bonded in as part of the rear fuselage section, you have to rip it out which is not great. However it came out easy enough nevertheless.

A few minor complications surfaced; the Rarebear motor requiring two sized mounting screws, M3's and M2.5's and, while I had some of the latter, I had none 30mm long so had to improvise somewhat. Also, the Funfighter motor comes with mini-bullet connectors, however I unsoldering the 3mm connectors from the stock motor and fitting these to the new unit solved that hiccup easily enough.


So the Radjet is now all set up and waiting for the glue to dry before I take it out and give it a good blast around the paddock. I'm looking forward to that...

Thursday, 18 September 2014

Performance Anxiety

...how big is your prop?

The only minor concern I have regarding the Canadair 415 is whether the props are sufficiently large; I traded in the 8x3.8 slow-fly props for three-bladed 7x4.5's following the methodology of dropping one size going from two blades to three. However, in this case, the original prop is a slow-fly paddle version, so I'm thinking that going for a regular eight-inch three-blade would have been a better equivalency. 


Anyway, I might do a power test on a scale just to get a rough idea of how much thrust to expect; the 210W bell motors are rated at a max 880g thrust which, pushing the lightweight Canadair 415, would probably give it unlimited vertical performance...

Tuesday, 19 August 2014

Canadair 415 Build Issues

...not as easy as you'd expect

The Canadair 415, whilst claiming to be ARF, does presents some quite challenging issues not clear from the list of required items.

Firstly, in order to run two ESC's from a single battery you need a special Y-lead. In fact this lead is so special that it doesn't exist. I decided, in the absence of anything else available, to modify a battery Y-lead, however this requires unsoldering the three connectors and reversing them. However I have discovered, posthumously as it were, that what you really want is an ESC set, which is two ESC's, 30A in this case, already wired together with a single XT60 plug to go to the battery.


This arrangement is actually cheaper than buying two 25A ESC's, a set of XT60 plugs, a battery Y-lead and resoldering. And probably more efficient knowing my soldering. Anyway, as I said, I only discovered this after ordering the above bits, but I think the ESC set is definitely the way to go.

The second challenge is how to mount the motor; I think the 415 was originally set up to have a reduction gearbox, as the motor recess is low in the nacelle. The kit provides sticks but no mounts for the stick. Additionally, these need to be offset mounts, mainly referred to as heat sink type, not those are usually available.

Moreover, the diameter of the motor base needs to match the heatsink mount, unfortunately the motors I chose are have are an in-between 9mm. So I am considering installing a plywood firewall for a conventional mounting arrangement, however have still not decided exactly how.

Finally, although I'm yet to get that far, is the kit assumes that bracing wires will be fitted from the wing to the fuselage, to compliment the rather fragile ply spars in the wings. As no one wants to do this, one is then required to somehow brace the wing internally; I have some carbon tubes and rods I plan to use, although exactly how I will install them is still to be decided...

Friday, 7 March 2014

New Motor for the Phoenix

...installed and tested!

The Turnigy 2217 motor has been installed and test flown and all's well, having failed to make a note of it in my excitement to get the Phoenix 1600 up and running.


The Turnigy 2217 motor is the same size (28mm) and has the same shaft diameter (3.175mm) so installation is easy, except for two mounting holes in the Phoenix fuselage requiring slotting to match the motor mounting plate.


The motor mount is just a cross-piece without any backing plates, unlike the plywood mounts provided on the Phoenix's stock setup. Also, the mounting screws were tiny - undersized even for mounting only through the  Phoenix's moulded fuselage, so I used some slightly longer screws to ensure sufficient engagement - I really don't want the motor coming loose during a flight...

Apart from that the motor works well - it pulls strongly and is quiet even at full throttle which is nice for a glider...

Friday, 28 February 2014

More on the Phoenix 1600 with Floater Jet Motor

...still looks dodgy but goes a little better

Having run the Phoenix 1600 fitted with the Floater Jet motor on large prop for a couple of flights, it was clear that things were not well. Although the motor would launch the glider OK, after a while I could hear the motor skipping. Checking the specs, its speed rating is 2150kv compared to 1050kv, more than twice as fast, which explains the difficulty it was experiencing trying to spin the big 10.5x6 prop.


I swapped it over to the 6x5 prop I had been using on the Floater Jet and found things to be a bit happier - still under-powered but at least the motor was running true. However the appearance was rather unlovely so, having noticed a tweeter housing I'd set aside thinking it might be useful for something, I set about crafting a cowling for the front-mounted motor.

Surprisingly, things went rather well, and I fitted the cowling on with tack adhesive for convenience. It now looks like a 60's power glider fitted with an old-fashioned nose-job. While looking less ugly, it also seems to make the glider fly more efficiently - not more thrust but the battery now holds up for longer.


I've ordered a replacement motor, having abandoned hope of Hobbyking quickly processing my warranty claim. That will arrive next week, giving the Phoenix the power it deserves...

Saturday, 22 February 2014

Phoenix 1600 with Floater Jet Motor

...yes I was desperate

Well, It's been almost a week since the maiden flight of the Phoenix 1600 when the motor wiring, incorrectly pre-installed in contact with the outrunner motor, rubbed through. I'm yet to hear from Hobbyking's customer service, in fact my warranty request hasn't even been allocated to anyone yet!

Tired of the almost-new Phoenix languishing in a disassembled state on the study desk, I embarked on a project to give it some power. My first call was to the local RC shop, in the hope they might have a suitable outrunner I could install. I say hope as they are geared mainly towards cars but, after some searching, the assistant found a few motors hidden on the bottom shelf, literally.

One motor was a close match, a 1000kV versus the OE 1050kV unit, and just slightly bigger. Uncertain I headed home to check the Phoenix's fuselage size just to make sure. I also did a bit of research on motor sizes and specs, not being on to speed on motor jargon.

A little while later I decided to give up the quest for a new motor - trying to match speed, mounting hole pitch, motor orientation and shaft size in a hurry wasn't going to happen.

So the next option was to use what was available. I didn't have any spare motors, and the only plane I would rob was the Floater Jet of the annoyingly-variable flying characteristics.


This proved less simple than I had hoped. For a start, robbing the motor from the Floater meant I had to remove the connectors from the end as these couldn't fit through the tiny access hole to the motor. Then I discovered the mounting hole pitch was different to that of the 
Phoenix's stock motor, which entailed having to make up special stiffening bosses to get it to fit. Of course the Floater motor is an external fitting type, unlike front drivers which have the motor inboard.

In the end, after much foraging around, drilling holes and shopping for tiny screws, the Floater motor was finally installed and the Phoenix's prop connected. Of course, the configuration means it's ugly. However, desk testing indicates the motor is capable of running the much-larger prop quite happily, although it is expected it will not have the same grunt in high-demand situations like steep pull-outs.

Nevertheless, I expect it will be sufficient to get the Phoenix into the air and flying around, which is all I'm wanting for now - just to get it some air...

Thursday, 28 November 2013

Motor Shaft Fixed

...and the Walrus flies again

I wasn't too sure of fixing the Walrus motor, although I had read that replacing bent shafts appeared to be common enough, so re-securing the shaft in the motor shouldn't be too hard. However The circlip really didn't inspire too much confidence.

As it turned out I couldn't get an 3mm external circlip anyway, but what I did get I think is better, although it required a little modification to the motor mount. The external locking ring has almost full engagement around the shaft and I really can't see that coming loose, unlike the sad little circlip (which I found hiding in the fuselage).


Champion 3mm Spn Type Ext Lock Ring

The only problem is the outer diameter (10mm) is much larger than the circlip, so the hole in the bulkhead had to be increased from the original 8mm to about 12mm, which I did with a round file.

Having re-assembled the motor and done a brief power test (happily the prop didn't fly off) I checked the weather then dashed off to the field with the Walrus for a fly before the rain came returned...